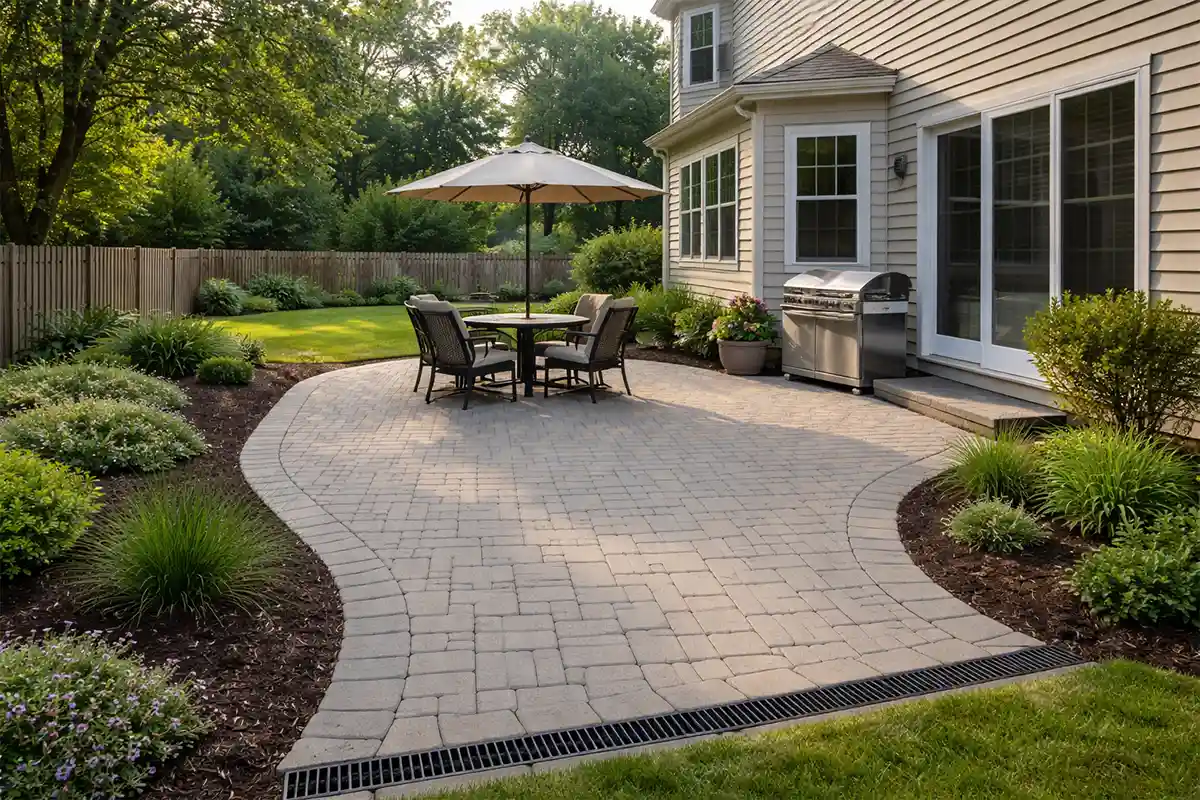
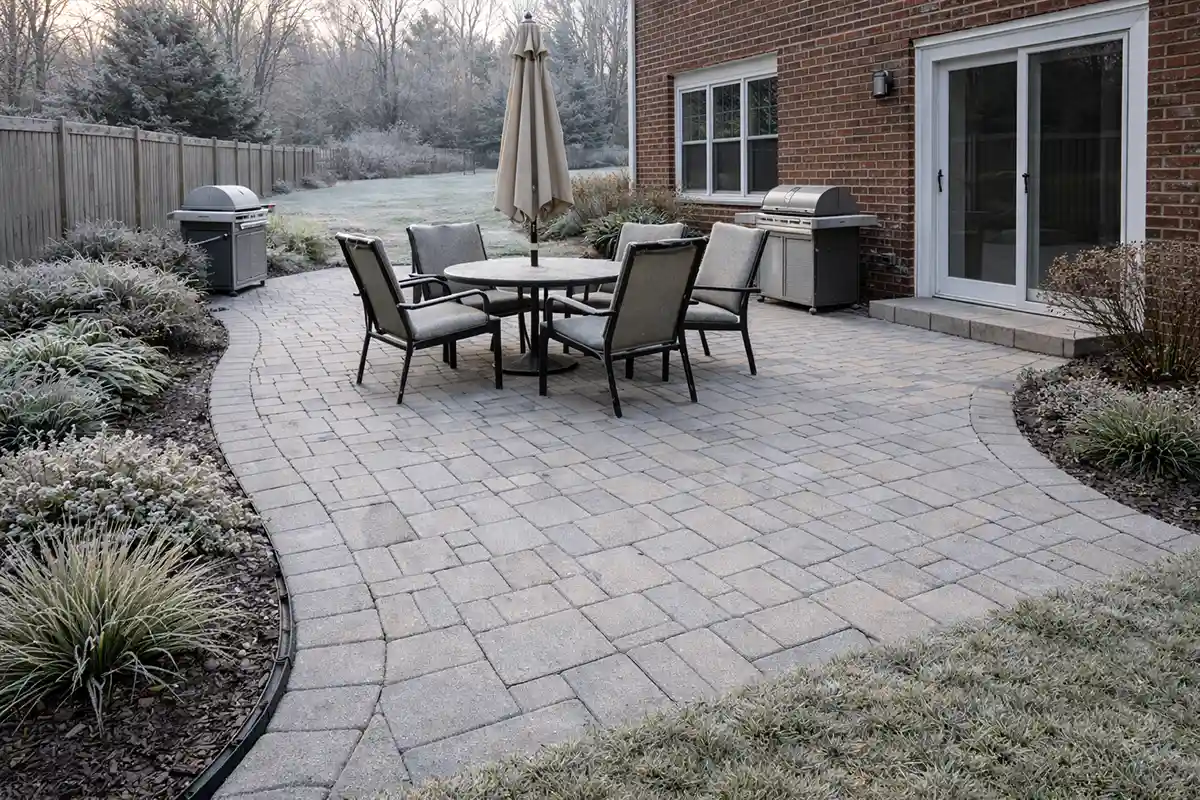
Before you think about pavers, color, or furniture placement, stand at your back door and look down at the patio surface. Notice how far it extends—maybe 10 to 15 feet—and how it meets the siding at a fixed height just below the door threshold. That starting position tells you whether this project will stay low maintenance or slowly turn into a repair cycle.
Your first job is not building. It is observing. After a normal rain, watch where water moves within the first 30 seconds. If it drifts away from the house in a steady sheet, you are starting correctly. If it hesitates or forms a thin reflective strip along the siding line, that behavior will repeat every storm.
One heavy rainfall does not create visible damage. Repetition does. When the same 1- to 2-foot strip near the foundation stays darker longer than the center, that is the early stage of a maintenance problem—even if nothing looks cracked yet.
Many homeowners believe a patio must be perfectly level so chairs do not wobble. That sounds reasonable, but it is wrong. A gentle slope of about 1/4 inch per foot is barely noticeable under furniture legs and is essential for moving water away from the structure.
I have watched homeowners run a hose from the door line toward the lawn just to see what happens. When water glides steadily outward instead of circling back toward the siding, they immediately understand the difference. That small test is the first real confirmation that the system is set up correctly.
From a structural perspective, drainage direction is the controlling behavior; if water cannot exit cleanly at the surface, every layer below stays under stress.
Start With Proper Drainage Slope
Step 1: Set the directional plane.
Stand along the house wall and look across the patio toward the yard. Over a 4-foot distance, there should be roughly a 1-inch drop. You may not see it clearly with your eye, but you should see it in how water behaves.
The first contact point is where the patio meets the foundation. When rain spills from the roof edge and lands within inches of that seam, it tests the slope immediately. If water slides outward toward the lawn, the plane is correct. If it spreads sideways or pools within a foot of the wall, the slope must be adjusted before moving on.
Do not continue to excavation or material selection until this directional behavior is confirmed. This step controls everything that follows.
Excavate Deeper Than You Think
Step 2: Create a stable support zone.
After slope direction is established, remove enough soil to build a strong base. In many residential settings, that means excavating 8 to 12 inches below finished surface height. Look at the soil condition at the cut edge—if it appears soft or clumpy after rain, shallow excavation will not hold long term.
The base is what distributes weight across the entire 12- to 15-foot span. If you remove only a few inches of soil, the native ground beneath can expand and contract. Over repeated wet-dry cycles, that movement shows up as a 1/2-inch dip or a slight tilt along a straight siding reference line.
A common mistake is assuming surface thickness equals strength. Strength comes from depth and support, not from how thick the top layer looks.
When excavation depth is correct, the patio edge remains aligned with the driveway or lawn border season after season without subtle settling at one corner.
Compact the Base in Controlled Layers
Step 3: Lock the support in place.
Once excavation is complete, add base material in layers—typically 2 to 3 inches at a time. Compact each layer fully before adding the next. If you step on a freshly placed layer and leave a visible footprint, it is not ready for the next lift.
This layering prevents future compression. Without it, heavy objects placed in the same 2-foot zone—like grills or seating areas—gradually press weak pockets downward. The first sign is often a slight wobble when furniture sits near the center.
Do not rush this phase. Controlled compaction changes how the patio responds to repeated weight and seasonal shifts.
When done properly, the surface feels consistently firm from the house edge to the outer border, and alignment stays true along visible references like the door frame or fence line.
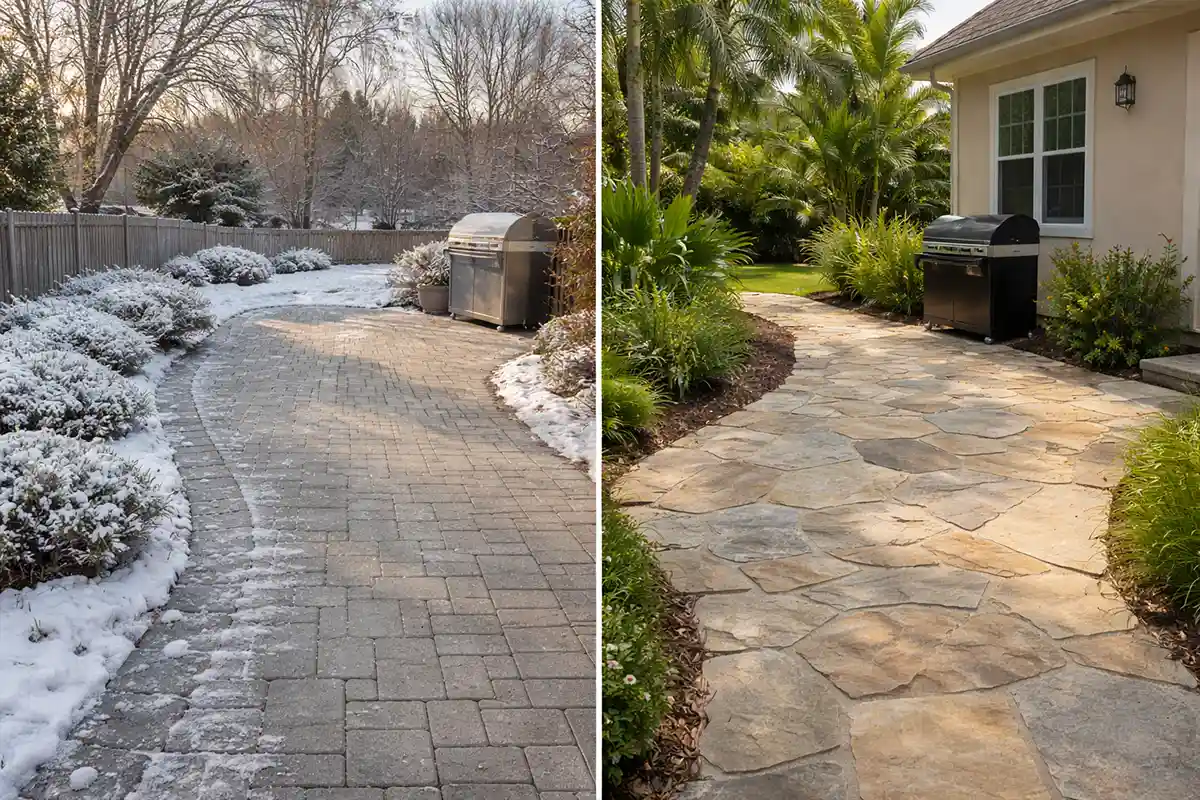
Choose Surface Materials Based on Climate
Step 4: Match material to environment.
Now that the structural base is set, choose a surface that works with your climate, not against it. In regions with freeze-thaw cycles, modular pavers allow small seasonal shifts between joints. Large slabs without proper control spacing may develop visible cracks that extend several feet.
Observe how materials respond to water and temperature. In humid conditions, porous stone may darken in shaded corners where airflow is limited. In hotter climates, lighter-colored surfaces reflect sunlight and stay cooler under bare feet.
A common belief is that color and pattern are the most important factors. Durability depends more on how the material handles expansion, contraction, and moisture exposure.
When material selection aligns with slope, depth, and compaction, the system transitions from installation mode to stable performance. At this point, the patio should drain evenly, sit level relative to the door threshold, and show no early signs of uneven settling.
When planning how this surface connects to seating areas and daily routines, the layout guidance explained in How to Design a Comfortable Patio for Everyday Use helps ensure that function and durability work together rather than creating new maintenance pressure points.
Control Joint Gaps to Reduce Weed Growth
Step 5: Stabilize the surface seams.
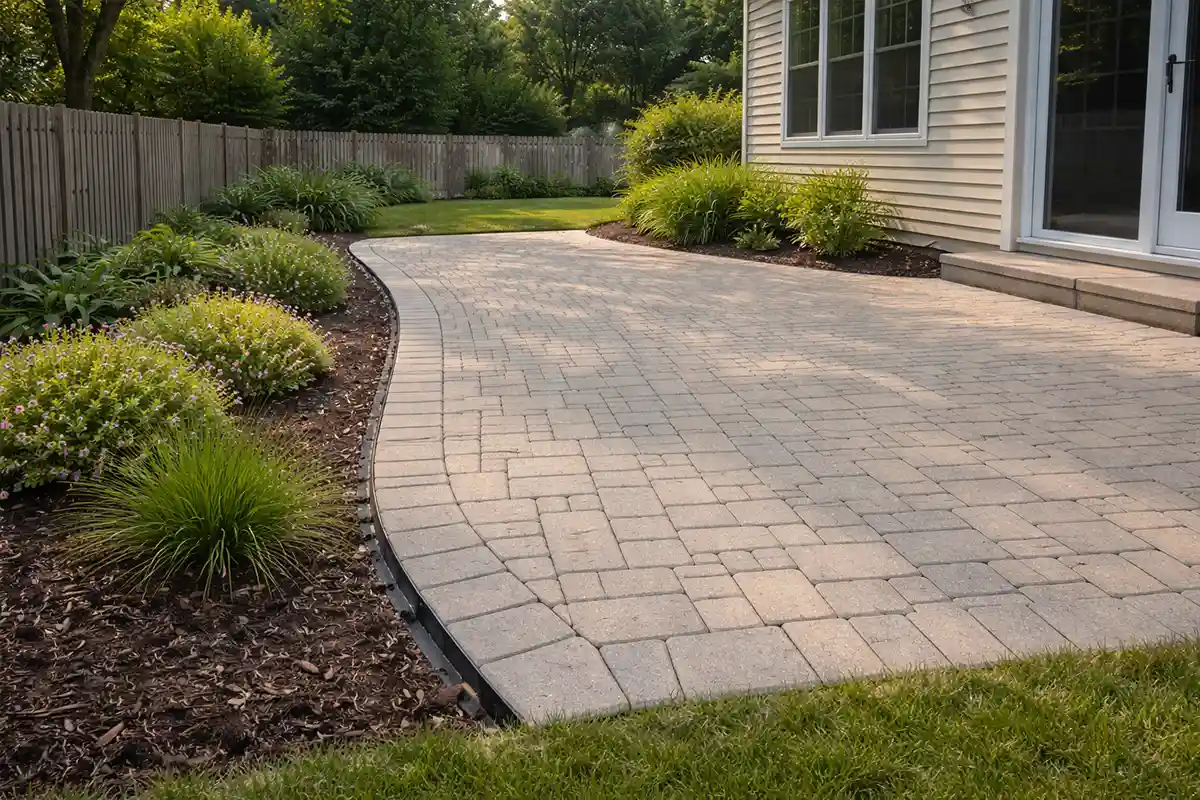
Now that the base and surface material are in place, shift your focus to the lines between each unit. Look down a straight 10- to 12-foot row of pavers. If the joint spacing varies—tight near the house and wider near the outer edge—those wider sections will collect debris first.
The physical plane being corrected here is the joint gap itself. When spacing stays consistent, typically around 1/8 to 1/4 inch depending on the system, there is less room for dust and seed particles to settle. When gaps open unevenly, especially along a 2-foot strip near the border, soil buildup begins repeating in that exact line.
Do weeds mean the patio was installed poorly?
Not always. They usually indicate debris-filled joints, not defective stone.
Is wider spacing better for drainage?
No. Drainage depends on slope, not oversized gaps.
Will sealing stop weeds completely?
No. Sealers reduce absorption but do not prevent soil from entering open seams.
Can I skip joint maintenance if the base is solid?
No. Even a strong base cannot prevent surface debris from settling in wide gaps.
A common belief is that pulling weeds once a season solves the issue. The real problem is repeated organic buildup in the same 1-inch channel. Once joint spacing is corrected and filled firmly to the top edge, the visible cue changes from dark, gritty lines to clean seams that dry evenly after rain.
The sequence is clear: consistent joint width → reduced debris capture → less moisture retention → slower weed growth.
Install Strong Edge Restraints
Step 6: Lock the perimeter in place.
Stand at the outer 15-foot edge and sight along the border relative to the fence or driveway line. If the edge appears slightly bowed outward, lateral movement has begun.
Edge restraint is the structural adjustment here. Anchored edging, secured several inches into compacted base, prevents the outer row from spreading. Without it, each footstep applies slight outward pressure that adds up over months and years.
A common misconception is that heavy pavers will hold themselves in place. Weight does not stop sideways creep, especially when soil along the edge softens after heavy rain.
When perimeter restraint is properly installed, the chain becomes: anchored border → reduced outward force → stable alignment → tighter edge joints. Over time, you should see no widening gap along the lawn side, and the border should remain straight relative to the siding plane.
Prevent Soil Migration From Surrounding Beds
Step 7: Correct the elevation difference.
Look at the height of nearby planting beds compared to the patio surface. If mulch or soil sits even 1 inch higher than the paver edge, water will carry fine particles downhill during heavy rain. After a storm, you may notice thin dirt streaks extending 6 to 12 inches onto the surface.
The structural fix is simple: lower bed soil slightly below patio height or add a defined border that creates a clean vertical separation. That small height shift changes how runoff behaves.
In states with strong seasonal rainfall patterns, like Georgia, repeated storms make soil migration obvious within one season. The same 2-foot strip along the edge becomes gritty and darker.
Many homeowners believe the patio is separate from the planting bed and won’t be affected. In reality, gravity connects them. Once the elevation difference is corrected, runoff returns into the planting area instead of spreading across the hard surface.
The broader grading logic discussed in Why “Low-Maintenance” Front Yards Often Become High Maintenance applies here because small lot-level height differences influence how water and soil move across connected surfaces.
Avoid Overly Complex Layout Patterns
Step 8: Reduce unnecessary stress points.
Examine the pattern across a 12- to 20-foot section. Complex layouts with many small cuts create additional joint lines. Each extra seam becomes another transition point where slight height differences can develop.
Run a broom across the surface. In straight, parallel rows aligned with the house wall, debris moves cleanly toward the edge. In intricate angled layouts, leaves collect in tight corners and along irregular lines.
A common belief is that more complex patterns automatically add long-term value. While they can look detailed, they also increase maintenance points. Simplifying layout lines reduces stress concentration and makes alignment easier to monitor.
When lines run parallel to siding or window frames, you gain a visual reference that quickly reveals any shifting.
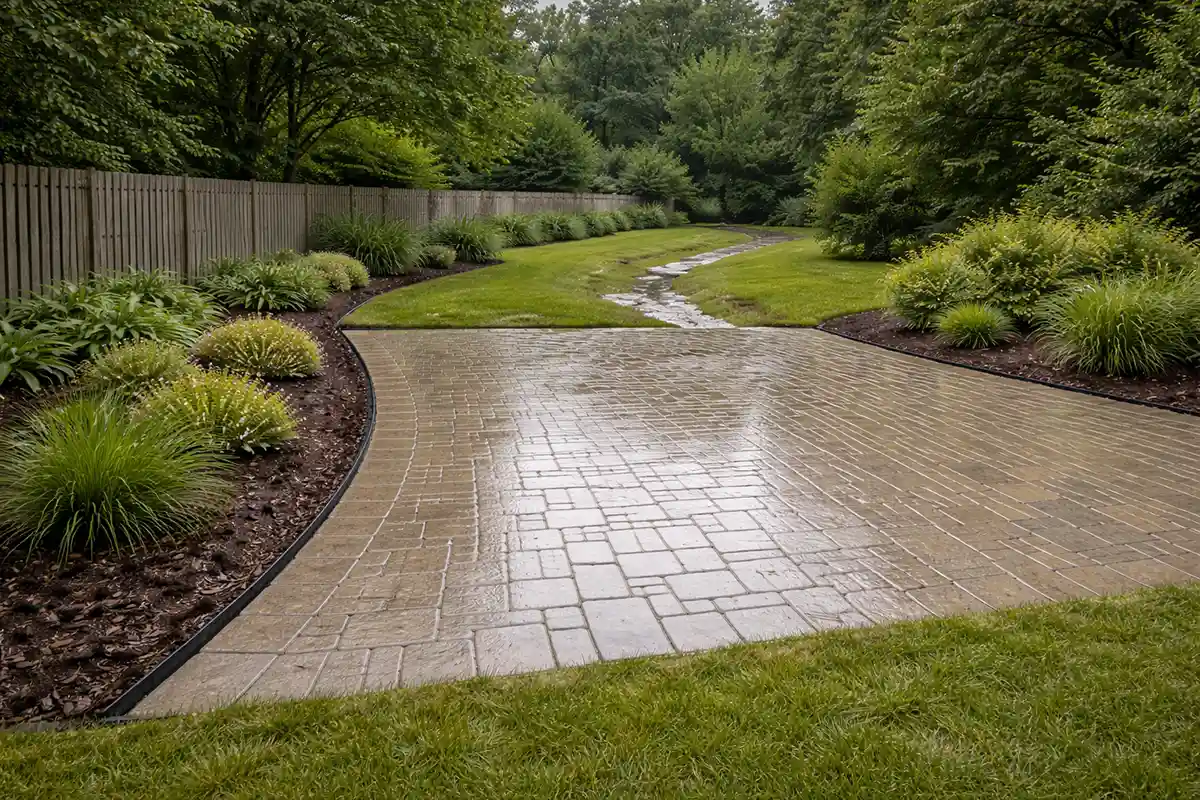
Plan for Proper Surface Drainage Beyond the Patio
Step 9: Extend the slope into the yard.
Water leaving the patio surface is not the final step. Stand at the border after heavy rain. If runoff stops within 2 feet of the edge and forms a shallow reflective band, the surrounding grade needs adjustment.
The structural change occurs beyond the hard surface. A shallow swale or slight downward grade shift directs water farther into the yard. This prevents moisture from migrating back toward the base.
Some homeowners believe once water clears the pavers, the job is done. In reality, standing moisture just outside the edge can destabilize the perimeter over time.
When the slope continues past the patio, the progression becomes: extended grade → redirected runoff → reduced soil saturation → stronger edge stability.
At this point in the sequence, the patio should drain evenly from the door threshold to the lawn, maintain straight borders, and show no repeating soil or debris accumulation along the seams.
Reduce Shade-Related Moisture Problems
Step 10: Balance light and airflow across the surface.
Now that slope, joints, and edges are stable, observe how the patio dries after rain. Stand 4 to 6 feet from the house and scan the full width. If one 2-foot section near a fence or under a tree canopy stays darker longer than the rest, moisture is lingering in that zone.
Shade alone is not the problem. The issue is repeated moisture at the same height and angle. If branches hang 8 to 10 feet above the surface and block airflow, water evaporates slowly. Over time, that shaded corner becomes slightly slick under bare feet.
A common belief is that algae appears simply because patios are outdoors. In reality, algae forms where moisture repeatedly settles in the same place. When airflow improves—through trimming lower limbs or reducing solid barriers that block cross-breezes—the damp pattern changes. The surface begins drying evenly from siding line to outer edge.
The visible result of a stable moisture balance is simple: no single patch remains dark hours after rainfall, and no 1-foot strip feels tacky while the rest feels dry.
Sealers: When They Help and When They Don’t
Step 11: Add protection only after stability is confirmed.
Before applying any sealer, confirm that the surface drains correctly and feels dry through its full thickness. After a clear weather window, check the patio 24 hours after rain. If the color tone is consistent from house wall to lawn edge, conditions are ready.
Sealers create a thin protective layer across the top face. When applied correctly, you will see water bead into rounded droplets and roll in the same direction as the established slope.
A common misconception is that sealing prevents cracks or movement. It does not. If a slab lacks control spacing or pavers shift even 1/2 inch due to base instability, hairline cracks will still appear. A glossy finish cannot compensate for structural imbalance.
If haze or cloudy patches appear along a 3- to 4-foot section near the door threshold, the surface was likely sealed while still holding moisture. Proper timing matters as much as product choice.
The correct progression is: stable drainage → fully dry surface → protective layer → reduced staining. Skipping earlier steps interrupts that chain.
Build for Seasonal Movement
Step 12: Confirm expansion tolerance.
Look down a straight 15-foot line aligned with a window frame or driveway edge. Through hot summers and cold winters, spacing should remain consistent. Small expansion gaps or control joints allow the surface to adjust without forming long cracks.
When seasonal movement is accommodated, minor shifts occur inside those designed lines. You may see a faint joint line, but no fracture extends more than a few inches. The patio remains flush with the door threshold, and no corner lifts higher than the adjacent lawn.
If expansion space is missing, the pattern becomes predictable: temperature swing → internal stress → hairline crack → moisture entry → widening crack next season. At first, the crack may be only 4 to 6 inches long. Without correction, it can stretch several feet across the slab.
Half measures slow progress but do not stop it. Replacing joint sand without addressing base movement, or cutting a single control joint while ignoring other stress areas, shifts pressure to the next weak point.
Without intervention, repetition strengthens the problem. Small cracks collect moisture, moisture expands, edges lift slightly, and the affected area grows outward from the original line.
Decision Threshold
-
Monitoring stage: No visible widening gaps; no height difference at edges; only routine inspection along seams.
-
Adjustment stage: Hairline cracks under 6 inches appear but do not extend across multiple pavers.
-
Structural intervention stage: Cracks exceed 2 to 3 feet or one section sits noticeably higher relative to the siding line.
Observable Stability Checklist
-
Surface dries evenly from house wall to lawn edge.
-
No 1- to 2-foot section remains darker after rainfall.
-
Border alignment matches driveway or fence without bowing.
-
Joint tops remain level with paver surfaces.
-
No crack exceeds a few inches without stopping at a control line.
-
Patio height stays consistent relative to the door threshold.
-
Water beads and rolls in one clear direction.
-
No recurring soil streaks appear along the perimeter.
For recognized residential construction standards and site-preparation practices, guidance from the National Association of Home Builders reinforces many of these durability principles.