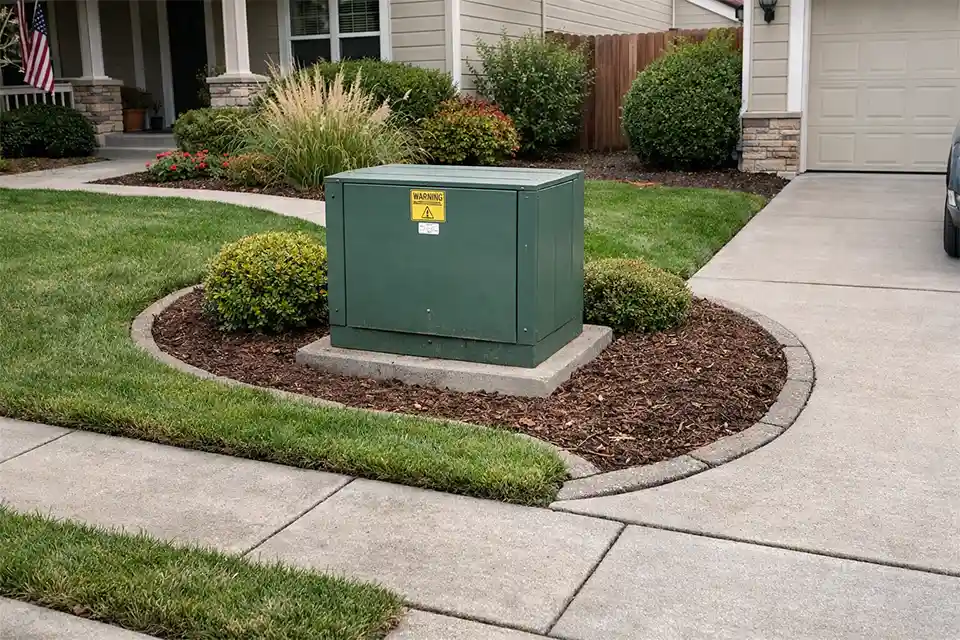
Front yard design usually breaks down around utility boxes for one reason: people treat the box as something to hide instead of a fixed obstacle that should reorganize the layout. The biggest front yard design constraints with utility boxes are spatial, not decorative.
Start with three checks. Measure the usable planting depth between the box and the nearest walk, driveway edge, or lawn boundary. If that space is under 4 feet, layered screening is usually the wrong move.
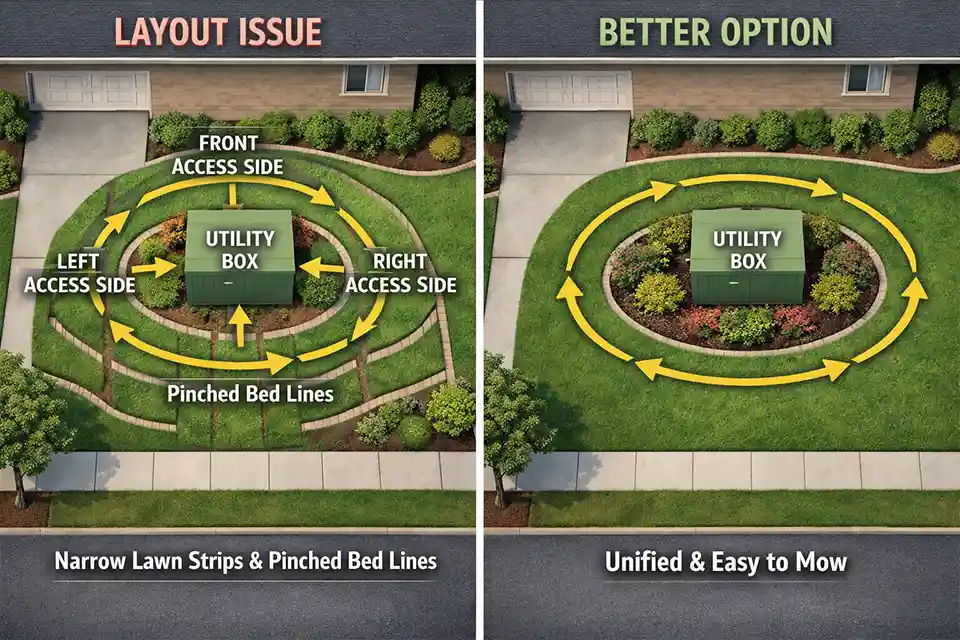
Count the accessible sides. If crews may need two sides, shrubs stop being landscaping and start becoming interference. Then study the lawn shape. If the box leaves two or more grass strips under 3 feet wide, the yard is already too fragmented.
That is the distinction that matters most. This is not mainly a visibility problem. It is a layout problem. A visible box inside a calm front yard almost always looks better than a half-hidden box surrounded by pinched beds, leftover grass, and trimming chores that never really end.
One blunt rule helps more than most design tips: if the utility box sits in the center third of the yard, stop leading with concealment. Lead with composition. Homeowners usually overestimate how bad the box looks on its own and underestimate how bad a chopped-up yard looks after they try to disguise it.
Quick Diagnostic Checklist
Treat the box as one of the main front yard design constraints if three or more of these are true:
- It interrupts the center third of the yard
- Usable planting depth around it is under 4 feet
- It creates two or more turf strips narrower than 3 feet
- A shrub screen would mature within about 2 to 3 feet of an access side
- The bed line has to bend in and back out just to wrap the equipment
- Mowing the area adds more than 5 extra minutes a week in peak growth
- The area still looks unresolved 6 to 12 months after cleanup
Those signs all point to the same mechanism: the box is forcing bad geometry.
What People Get Wrong First
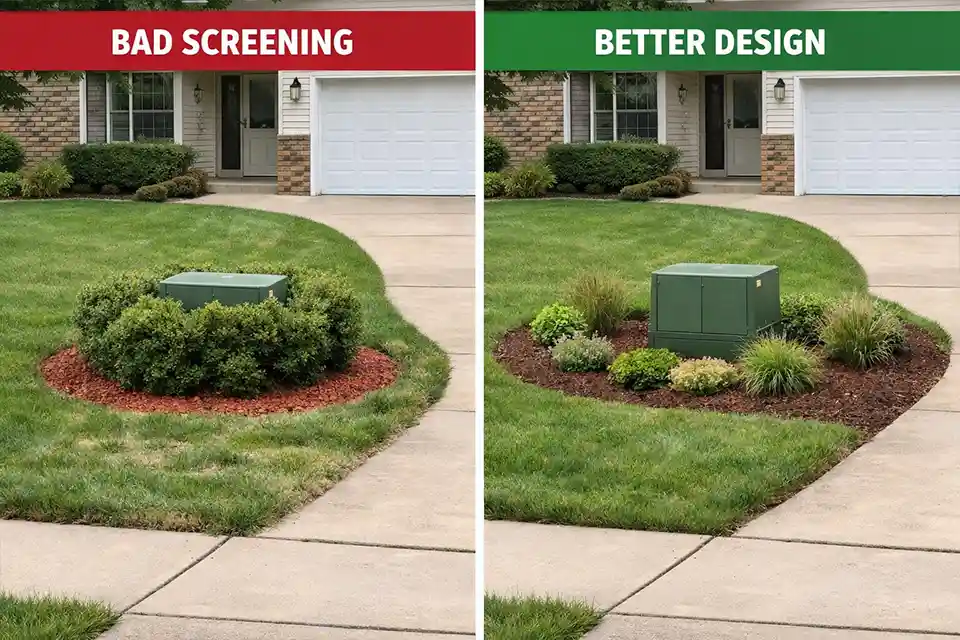
The first mistake is assuming screening is the obvious answer. In shallow front-yard space, it usually is not. Screening often makes the box more obvious because it adds another interruption around the first one. A box with a ring of shrubs rarely reads as hidden. It reads as a problem zone.
The second mistake is calling this a maintenance issue. Maintenance is the symptom. Layout is the cause. If a mower has to make multiple awkward turns around a 20- to 40-square-foot patch, the yard is already telling you the space was divided badly.
That is why small decorative beds around utility hardware disappoint so often. They may look neat for a few weeks, but they quickly become isolated upkeep pockets. The same pattern shows up in other fragmented front-yard layouts, which is why Front Yard Small Plant Beds Often Create More Upkeep Than Expected is closely related to this problem.
The Fix That Wastes the Most Time
The standard fix is predictable: a tight mulch bed, a few shrubs, maybe an ornamental grass. It usually fails fast.
Once planting depth drops below about 4 feet, there is not enough room for screening, readable bed lines, and open access at the same time. Something gives. Most often, it is the layout. A shrub that matures to 30 inches wide is not compact when the service side needs to stay open. If the plant will need repeated shearing just to avoid crowding the box, it was placed wrong from the beginning.
The bigger mistake is visual. A wraparound bed keeps the box at the center of attention. It does not calm the yard. It frames the interruption. And if the lawn still ends up in two or three narrow leftover strips under 3 feet wide, no mulch refresh is going to solve the real problem.
Dense hedges are the clearest waste of effort here. In many front yards, they start crowding access or getting hacked back within 12 to 24 months. That is not a pruning issue. It is the original layout decision failing on schedule.
Three Design Moves That Work Better
Most front yard design constraints caused by utility boxes in the yard come down to three workable responses. The mistake is trying to combine them in one small space.
Absorb the box into a wider bed
This works when the box sits slightly off-center and there is enough depth to build a real planted zone around it. The box should read as one object inside a larger bed, not as the reason the bed exists.
As a practical threshold, this option starts to make sense only when you can create a continuous bed about 6 to 8 feet deep without squeezing circulation. Keep lower plants near access sides. Put height and mass farther away, where they help the composition instead of fighting service access.
That same continuity logic matters in other broken front-yard layouts too, which is one reason Front Yard Design Challenges With a Large Driveway overlaps naturally with this topic.
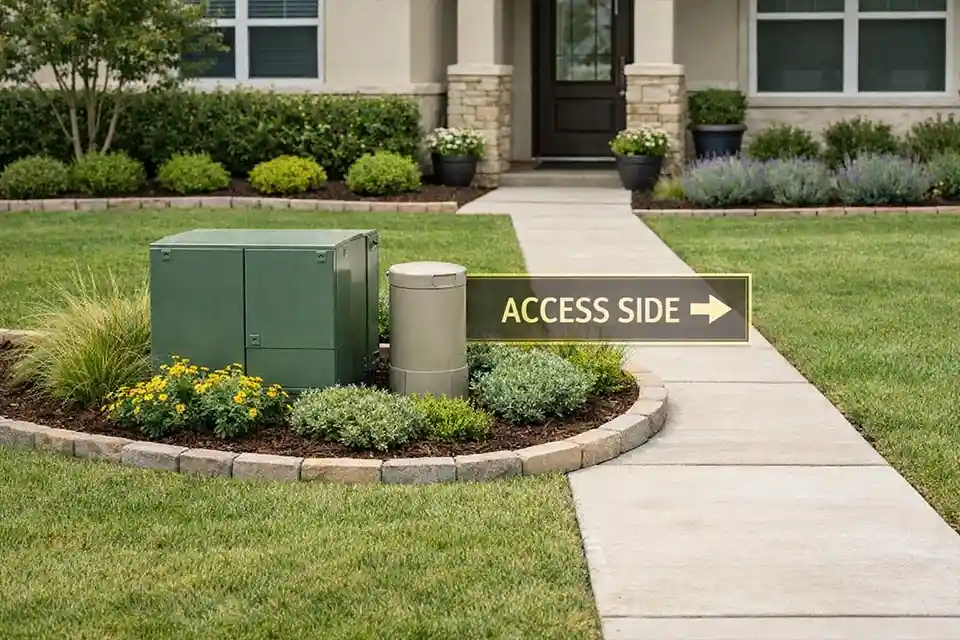
Simplify the area into an open service zone
This is often the better answer in smaller yards. If usable planting depth is under 4 feet, stop trying to make concealment happen. A low planting zone or simple open ground plane usually looks more deliberate than a cramped fake screen.
In front yards under roughly 1,500 to 2,500 square feet of landscape area, simplification often beats layering. Keep plant height around 18 to 24 inches, preserve an obvious access side, and remove tight grass collars that add work without helping the design.
Pro Tip: If a redesign adds more edging, more corners, and more trimming than it removes, it is probably moving in the wrong direction.
Shift the visual center away from the box
When the box sits in the strongest visual axis of the yard, solving the box directly is often the wrong goal. The better move is to make something else matter more. That may be the walkway approach, porch planting, a tree canopy, or a stronger bed composition away from the service zone.
This is especially useful on narrow or constrained front yards, where forced symmetry makes fixed obstacles even louder. The same imbalance shows up in Front Yard Design Problems on Narrow Lots.
Comparison Guide
| Site condition | Wrong move | Better move | Decision threshold |
|---|---|---|---|
| Under 4 feet of usable planting depth | Force layered screening | Use a low planting or open service zone | Screening usually fails below 4 feet |
| Two or more access sides | Plant all around the box | Keep one or more sides visually open | Repeated shearing means placement already failed |
| Turf strips under 3 feet wide | Preserve every patch of lawn | Redraw bed lines and remove fragments | Below 3 feet, turf usually becomes clutter |
| Box in the center third | Try to hide the hardware first | Rebuild composition first | Center placement makes concealment secondary |
| Off-center box with 6 to 8 feet depth | Create a small island bed | Fold it into a unified planted zone | 6 to 8 feet supports a calmer solution |
When to Stop Trying to Hide It
There is a clear point where cleanup stops being smart. If the box still leaves pinched bed edges, leftover turf islands, or repeated pruning after one redesign cycle, stop refining it.
At that point, the better answer is usually to reduce lawn complexity or move the planting emphasis elsewhere. The goal is not to make the box disappear. It is to stop the box from controlling the whole yard visually.
That boundary matters even more under HOA limits. If plant height, screening style, or bed expansion are restricted, concealment may not be realistic at all. In those cases, clean low planting with obvious access often looks more intentional than a compromised hidden-box attempt, which fits the same logic as Front Yard Design Constraints When HOA Rules Limit Plants.
Front yard design constraints with utility boxes get easier to solve once the yard is judged as a composition problem first and a hiding problem second. The strongest result usually comes from fewer shapes, clearer access, and a better visual center, not from wrapping the hardware in more decoration.
For broader official guidance, see the University of Maryland Extension.